Smart living Way

Smart Home Security

Can a Dashcam Be Used for Home Security

Can a Dashcam Be Used for Home Security? Discover the Power of Video Surveillance!

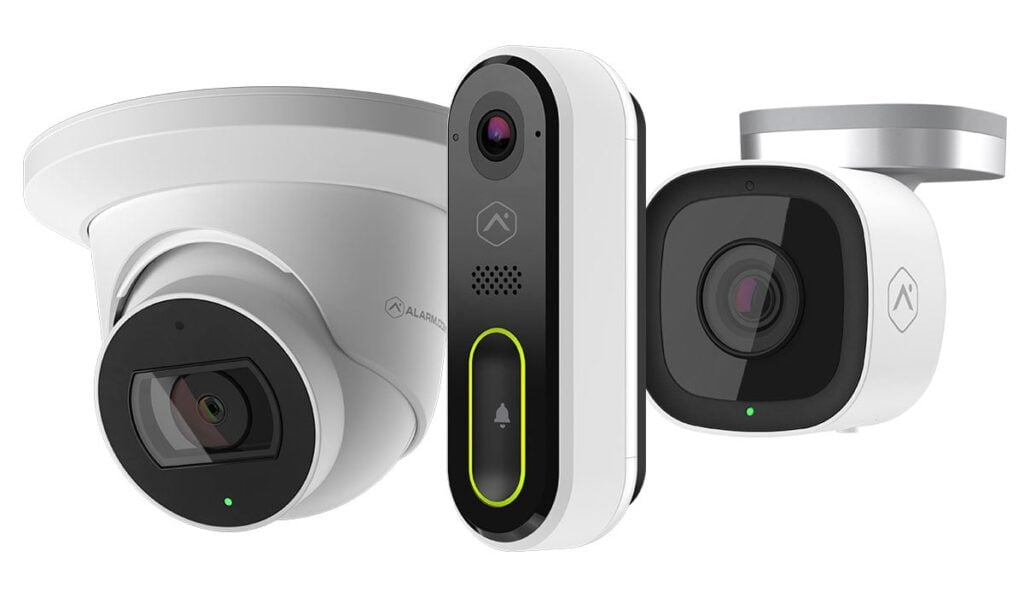
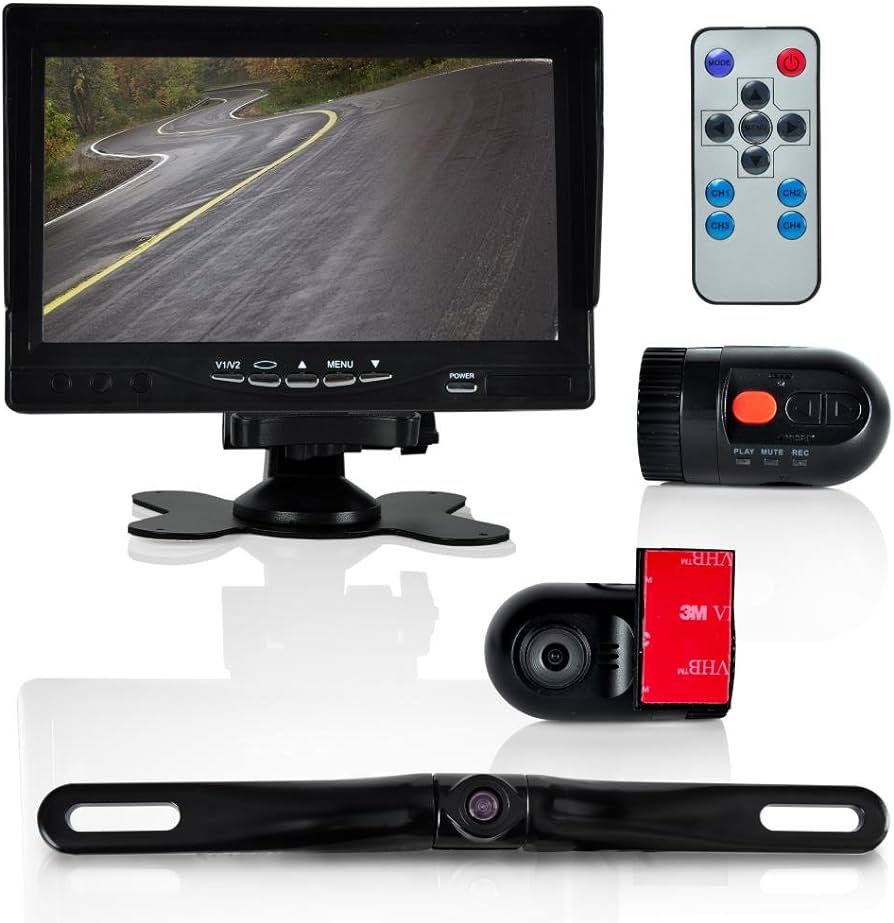
Yes, a dashcam can be used for home security by capturing any suspicious activity and providing valuable evidence for identifying perpetrators and recovering stolen property. Dashcams can be mounted on entrances, windows, or porches to capture visitors as they arrive, making them useful as temporary home security cameras or nanny cams. The Power Of Video Surveillance Yes, a dashcam can be used for home security purposes. It can be mounted at entrances to capture visitors or suspicious activity, automatically recording and providing valuable evidence in case of any incidents. Additionally, dashcams with features like motion detection can be used as temporary home security cameras. Dashcams: More Than Just Car Accessories When it comes to the topic of home security, we often think of traditional surveillance cameras or alarms. But did you know that a dashcam, typically used for recording incidents on the road, can also be repurposed as a home security device? That’s right! A dashcam is more than just a car accessory – it can provide an extra layer of protection for your home as well. By utilizing the power of video surveillance, a dashcam can capture critical footage of any suspicious activity or unexpected impacts that may occur around your home. The ability to automatically start recording when triggered makes it an ideal tool for capturing valuable evidence that can assist in identifying perpetrators and recovering stolen property. So, how exactly can a dashcam be used for home security? Let’s explore a few possibilities: Dashcams As Temporary Home Security Cameras If you’re looking for a temporary solution to monitor your home, a dashcam can be easily repurposed as a home security camera. Simply mount it near the entrance, a window, or even on your porch to capture visitors as they arrive. This can be particularly useful if you’re away from home for an extended period or if you want to keep an eye on specific areas of your property. Additional Security With Parking Mode Dashcams equipped with parking mode functionality can provide continuous surveillance even when your car is stationary. This feature allows the dashcam to remain active, monitoring the surroundings, and recording any suspicious activity. Utilizing parking mode as a home security camera offers an extra layer of protection, ensuring your property is safeguarded at all times. The Versatility Of Dashcams One of the great advantages of dashcams is their versatility. Not only can they be used in vehicles, but they can also serve as invaluable tools for home security. With innovative features such as motion detection, night vision, and high-resolution recording, dashcams can capture clear and detailed footage that can be crucial in identifying potential threats. So, if you’re considering enhancing your home security, don’t overlook the potential of a dashcam. It’s an affordable, easy-to-install option that can provide valuable visual evidence and an added layer of protection for your home. Whether used as a temporary security camera or in conjunction with other surveillance systems, the power of video surveillance that a dashcam offers should never be underestimated. Dashcams For Home Security Dashcams can be used for home security by capturing any suspicious activity or impacts, acting as a valuable evidence tool for identifying perpetrators and recovering stolen property. They can be mounted on entrances, windows, or porches to monitor visitors as they arrive, serving as temporary home security or even nanny cams. Additionally, dashcams with features like motion sensing security and parking mode can effectively deter thieves. Dashcams for Home Security Using Dashcams For Home Security: A Viable Option? With the increasing concern for home security, many individuals are exploring different solutions to enhance the safety of their homes. One option that has gained popularity is the use of dashcams for home security. While primarily designed for recording incidents on the road, dashcams can also be repurposed to provide an extra layer of protection for your home. How Can Dashcams Be Utilized For Home Security? Now you might be wondering, how can a dashcam function as a home security device? Well, it’s quite simple. Dashcams can be strategically positioned at the entrance, windows, or porch of your home to capture valuable evidence if any suspicious activity or impacts occur. By automatically starting recording when triggered, dashcams ensure that every critical moment is documented, aiding in the identification of perpetrators and facilitating the recovery of stolen property. Advantages Of Using Dashcams For Home Security There are several advantages to using dashcams for home security: Continuous Recording: Dashcams can record footage continuously, offering round-the-clock surveillance for your home. Easy Installation: Dashcams are typically designed for quick and simple installation, allowing you to set up your home security system in no time. Motion Detection: Many dashcams come with motion detection technology, ensuring that recording is triggered only when there is movement in the camera’s field of view. High-Quality Video: Dashcams are equipped with high-resolution cameras that capture clear and detailed video, essential for identifying individuals and objects. Remote Access: Some dashcams offer remote access through smartphone apps, enabling you to monitor your home security system from anywhere, at any time. Considerations When Using Dashcams For Home Security While dashcams can be a viable option for home security, there are a few considerations to keep in mind: Storage Capacity: Dashcams store footage on an SD card, so it’s important to ensure that the card has enough capacity to capture and retain a sufficient amount of video. Power Source: Dashcams typically require a power source to operate continuously. It’s essential to consider the placement of the dashcam in relation to access to a power supply. Privacy Concerns: When using dashcams for home security, it’s important to be mindful of privacy laws and regulations in your jurisdiction. Informing individuals of the presence of surveillance cameras is typically required. Conclusion All in all, utilizing dashcams for home security can provide an effective and convenient way to protect your home and loved ones. By repurposing this technology originally designed for recording incidents on the road, you can have an additional layer of

Can a Dashcam Be Used for Home Security? Discover the Power of Video Surveillance! Read More »

How to Set Home Security Alarm

How to Set Home Security Alarm: The Ultimate Guide to Smart and Effective Home Security

To set a home security alarm, follow these steps: 1. Understand the different modes of the alarm system (stay and away), as they work differently. 2. Choose the mode based on your needs and preferences. Credit: www.nytimes.com Understanding The Different Modes Of A Home Security Alarm System When it comes to home security, having an alarm system in place is crucial. But did you know that these systems have different modes? Understanding the different modes of a home security alarm system can help you maximize its effectiveness and protect your home in the best possible way. Stay Mode Vs. Away Mode There are usually two modes for a residential alarm system – stay mode and away mode. Let’s take a closer look at how these modes work differently: How They Work Differently Stay Mode: In stay mode, you are at home and only want to secure certain areas while you move around freely. This mode allows you to arm the alarm system and protect specific zones, while leaving other zones disarmed. It is perfect for nighttime protection or when you’re indoors but still want a certain level of security. Away Mode: On the other hand, away mode is used when you are leaving your home and want to secure the entire premises. Activating the alarm system in this mode arms all zones and provides comprehensive protection. It ensures that any unauthorized entry or suspicious activity is detected as soon as it occurs, giving you peace of mind while you’re away. Now that you understand the different modes of a home security alarm system, you can choose the most appropriate mode based on your specific needs. Whether you’re staying in or going out, making sure your alarm system is set correctly is essential for the safety of your home and your loved ones. Here are some tips to help you set your home security alarm system: First, familiarize yourself with your alarm system’s user manual or contact your alarm system provider for specific instructions. Locate the control panel of your alarm system. Enter the appropriate code to arm or disarm the alarm system, depending on whether you want to activate stay mode or away mode. If your alarm system has different codes for different users, make sure each person knows their code and how to use it. Consider adding secondary keypads in strategic locations, such as near the doors, to make it easier to arm or disarm the system. Make it a habit to always set your alarm system before leaving the house, even if it’s just for a short period. This ensures your home is always protected. By understanding the different modes of a home security alarm system and following these simple steps, you can enhance the safety and security of your home. Remember, prevention is better than cure, and a properly set alarm system can be a powerful deterrent against burglars and intruders. Arming And Disarming Your Home Security Alarm System How to Set Home Security Alarm Arming and disarming your home security alarm system is a crucial step in ensuring the safety and protection of your property. Whether you are leaving the house for the day or going to bed at night, properly arming and disarming your alarm system is essential. In this article, we will provide you with a step-by-step guide on how to arm and disarm your home security alarm system. Step-by-step Guide To Arming Your Alarm System Follow these steps to arm your home security alarm system: Locate your alarm system keypad. Enter your unique code using the keypad. Select the “Arm Away” mode to activate the entire alarm system. Ensure all doors and windows are closed and locked. Confirm that all sensors are functioning properly. Exit the premises and secure the door behind you. Your alarm system will be armed and ready to detect any unauthorized entry. Step-by-step Guide To Disarming Your Alarm System Follow these steps to disarm your home security alarm system: Locate your alarm system keypad. Enter your unique code using the keypad. Select the “Disarm” or “Off” mode to deactivate the alarm system. Make sure to enter the code correctly to prevent false alarms. If the alarm system was triggered and you are disarming it, ensure that there are no signs of intrusion before disabling the alarm system. Ensuring Proper Code Entry When entering your code to arm or disarm your home security alarm system, it is crucial to enter it correctly. Incorrect code entry may result in false alarms or the system not arming or disarming properly. To ensure proper code entry, follow these tips: Memorize your code and avoid sharing it with unauthorized individuals. Take your time and enter the code slowly and accurately. Avoid distractions and focus solely on entering the code. If you have trouble remembering the code, write it down and keep it in a secure location. By following these guidelines, you can effectively arm and disarm your home security alarm system, providing you with the peace of mind and protection you deserve. Key Components Of A Home Security Alarm System Setting up a home security alarm system involves key components such as environmental sensors and understanding the different modes, like stay and away. You can also easily install a DIY system using basic tools and properly positioning the sensors for optimal effectiveness. Remember to arm your system when leaving to ensure your home’s security. When it comes to ensuring the safety of your home and loved ones, having a reliable home security alarm system is crucial. But what are the key components of a home security alarm system? Let’s take a closer look at each one: Control Panel The control panel serves as the brain of your home security system. It allows you to arm or disarm the system, customize settings, and receive notifications. With a user-friendly interface, the control panel puts you in full control of your home security. Sensors Sensors play a vital role in detecting any unauthorized access to your

How to Set Home Security Alarm: The Ultimate Guide to Smart and Effective Home Security Read More »

Can Alexa Be Used for Home Security

Can Alexa Be Used for Home Security? Find Out How!

Yes, Alexa can be used for home security. With features like Alexa Guard, users can arm and disarm their security systems and receive smart alerts on their smartphones when activity is detected. Furthermore, Alexa can also integrate with various home security systems such as ADT, Adobe, Scout Alarm, and Ring Alarm, allowing users to control their security systems through voice commands. By enabling Alexa Guard and utilizing its features, homeowners can enhance the security of their homes and have peace of mind knowing that they will be notified of any potential threats or intrusions. Credit: www.amazon.com Alexa Guard: Protecting Your Home With Alexa’s Built-in Security Features Protect your home with Alexa’s built-in security features like Alexa Guard. This feature can detect potential intruders or alarms using microphone audio, providing an extra layer of protection for your home. Easily integrate Alexa with your existing home security system and control it with your voice. Overview Of Alexa Guard And Its Purpose When it comes to home security, Alexa is more than just a virtual assistant. It also has built-in security features, including Alexa Guard, that can help protect your home and give you peace of mind. Alexa Guard is an innovative feature that uses your Echo speakers as a security system, allowing you to detect and respond to potential threats. By enabling this option, Alexa will listen for certain sounds, such as footsteps, doors closing, or glass breaking, and send you an alert if any unusual activity is detected. So, whether you are at home or away, Alexa Guard ensures that your home is protected. How Alexa Guard Can Detect And Respond To Potential Threats Alexa Guard utilizes the microphones on your Echo speakers to listen for sounds associated with potential threats. By constantly monitoring the environment, Alexa can detect unusual activity and send you a smart alert directly to your mobile device. This means that if someone tries to break into your home or if there is an alarm going off, you will be instantly notified, providing you with the opportunity to take immediate action. Alexa Guard acts as an extra set of ears, helping to keep you and your loved ones safe. Exploring The Different Security Features Offered By Alexa Guard Alexa Guard offers a range of security features to enhance the protection of your home. One of these features is the ability to integrate with select home security systems, such as ADT, Adobe, Scout Alarm, and Ring Alarm. By connecting Alexa Guard to your existing security system, Alexa can set alarm systems and forward smart alerts, giving you comprehensive coverage. In addition to integration with home security systems, Alexa Guard also provides a “Deter” mode. In this mode, Alexa can randomly turn on and off lights, making it appear as if someone is home even when you’re away. This can act as a powerful deterrent to potential intruders, giving you an extra layer of security. Furthermore, Alexa Guard integrates with your other smart devices, such as smart locks and cameras, allowing you to control and monitor them using just your voice. You can lock and unlock doors, view camera feeds, and even arm and disarm your security system, all with simple voice commands. With Alexa Guard, you can turn your Echo speakers into a powerful home security system, providing you with peace of mind and enhanced protection. This innovative feature combines the convenience of Alexa with robust security features, making it an essential part of any smart home setup. Using Alexa To Arm And Disarm Your Home Security System The convenience of using voice commands to control your home security system has never been easier with Alexa. By integrating Alexa with your home security system, you can effortlessly arm and disarm your system, adding an extra layer of convenience and peace of mind to your daily routine. In this article, we will explore the steps to set up and connect your home security system to Alexa, how Alexa can be used to conveniently arm and disarm your security system, and the benefits of using Alexa for home security automation. Steps To Set Up And Connect Your Home Security System To Alexa If you’re wondering how to connect your home security system to Alexa, follow these easy steps: Make sure you have a compatible home security system that works with Alexa. Popular options include ADT, Adobe, Scout Alarm, and Ring Alarm. Open the Alexa app on your smartphone or tablet. Select the “Skills & Games” option from the menu. Search for and enable the skill that corresponds to your home security system. For example, if you have an ADT system, search for and enable the “ADT” skill. Follow the on-screen prompts to link your home security system account with Alexa. Once the connection is successful, you can start using Alexa to control your home security system. How Alexa Can Be Used To Conveniently Arm And Disarm Your Security System With Alexa, arming and disarming your home security system is just a voice command away. Here’s how you can do it: To arm your security system, simply say “Alexa, arm my security system” or “Alexa, set security system to armed.” To disarm your security system, say “Alexa, disarm my security system” or “Alexa, set security system to disarmed.” If you have a specific mode for your security system, such as “home” or “away,” you can also use Alexa to switch between modes by saying “Alexa, set security system to home mode” or “Alexa, set security system to away mode.” This seamless integration allows you to control your home security system with just your voice, eliminating the need for keypads or smartphone apps. It’s especially useful when your hands are full or when you’re in a hurry, providing a convenient and effortless way to manage your home security. Benefits Of Using Alexa For Home Security Automation Using Alexa for home security automation offers a range of benefits, including: Convenience: By using voice commands, you can easily control your security system without

Can Alexa Be Used for Home Security? Find Out How! Read More »

What Size Wire for Home Security System

What Size Wire for Home Security System? Find the Perfect Gauge for a Reliable Installation!

For a home security system, the recommended wire size is typically 22 AWG. This size provides sufficient conductivity and is commonly used for fire alarm, security, and CCTV cables. When it comes to setting up a home security system, choosing the right wire size is crucial for reliable and efficient operation. The wire size determines the electrical conductivity and load capacity of the system. This article will provide an overview of the recommended wire size for home security systems, specifically focusing on 22 AWG cables. Understanding the importance of wire size and its impact on the overall performance of the system will help ensure a seamless and effective security setup. So, let’s delve into the details and explore the benefits of using 22 AWG wire for your home security needs. Understanding The Importance Of Wire Gauge For A Reliable Installation Choosing the right wire gauge is crucial for a reliable installation of a home security system. The wire size will depend on factors such as the distance of wiring, power requirements, and type of sensors used, ensuring efficient functionality and protection for your home. Understanding the Importance of Wire Gauge for a Reliable Installation When it comes to installing a home security system, one of the most crucial factors to consider is the wire gauge. The wire gauge refers to the thickness of the wire, which plays a vital role in ensuring a reliable installation. From system performance to safety, the wire gauge selection can have a significant impact on the overall functionality of your security system. In this section, we will delve into the role of wire gauge, the impact of improper selection, and the factors to consider when determining the appropriate wire gauge for your security system. H3: The role of wire gauge in ensuring a reliable home security system installation The wire gauge directly affects the flow of electricity within your security system. Choosing the right wire gauge is essential to ensure that the current flows smoothly and efficiently, without any unnecessary resistance. An inadequate wire gauge can lead to voltage drops, which may result in a weak signal or power loss. On the other hand, using an excessively thick wire can be unnecessary and costly. It is crucial to strike a balance and select a wire gauge that meets the requirements of your security system without being excessive. H3: Impact of improper wire gauge selection on system performance and safety Improper wire gauge selection can have adverse effects on both the performance and safety of your home security system. Using an insufficient wire gauge can cause significant voltage drops over longer distances. This voltage drop may result in a weak signal, causing false alarms or a delay in receiving alerts. Moreover, inadequate wire gauge can lead to overheating of the wires, posing a safety hazard. On the other hand, using an excessively thick wire can be cumbersome and difficult to work with, leading to potential installation issues. H3: Factors to consider when determining the appropriate wire gauge for your security system Several factors need to be considered when determining the appropriate wire gauge for your security system installation. These factors include the distance between components, the current requirements of the system, and the voltage drop limitations. As a rule of thumb, it is recommended to consult the manufacturer’s specifications or seek guidance from a professional to ensure the correct wire gauge selection. To determine the appropriate wire gauge, you can use wire gauge calculators available online or refer to industry standards such as the National Electrical Code (NEC). Consider the distance between the central control panel and the sensors, cameras, or other components of your security system. Longer distances typically require a thicker wire gauge to mitigate voltage drops. Additionally, the current requirements of your security system should also be considered. Higher current demands may necessitate a thicker wire gauge to ensure a reliable flow of electricity. In conclusion, selecting the right wire gauge is essential for a reliable home security system installation. Proper wire gauge selection ensures optimal system performance and safety. By considering factors such as distance, current requirements, and voltage drop limitations, you can determine the appropriate wire gauge for your security system. Choosing The Right Wire Gauge For Sensors And Contacts Choosing the right wire gauge for sensors and contacts is crucial for a home security system. It is recommended to use 22 AWG fire alarm, security, and CCTV cable for optimal performance and protection. Overview Of The Recommended Wire Gauge For Sensor And Contact Installations Choosing the right wire gauge is crucial when it comes to installing sensors and contacts for your home security system. The wire gauge determines the amount of power that can be transmitted over a particular distance without significant loss. Using the correct wire gauge ensures that your sensors and contacts function optimally, ensuring the safety and security of your home. In this section, we will explore how to determine the appropriate wire gauge for door/window contacts and understand the relationship between wire gauge and sensor distance. How To Determine The Appropriate Wire Gauge For Door/window Contacts When it comes to door/window contacts, it is important to consider the distance between the contact and the control panel. The longer the distance, the more resistance the wire will encounter, potentially leading to a drop in voltage. To avoid voltage drop, it is recommended to use thicker wire gauge for longer distances. An easy way to determine the appropriate wire gauge is by referring to a wire gauge chart. These charts provide information on the maximum length of wire that can be used for a given gauge, based on the desired voltage drop. For example, if you have a door contact located 50 feet away from the control panel and you want to ensure a maximum voltage drop of 2%, you can refer to the wire gauge chart to find the appropriate gauge that meets this requirement. Here is a simplified wire gauge chart for door/window contacts: Wire

What Size Wire for Home Security System? Find the Perfect Gauge for a Reliable Installation! Read More »

Does Home Security Use a Lot of Electricity?

Does Home Security Use a Lot of Electricity? Find Out Now!

Home security systems, including surveillance cameras, do not use a lot of electricity. Modern security cameras typically consume just a watt or two of power, which is a negligible amount of energy and costs only a few cents per year. Additionally, low voltage systems require less power consumption, ensuring that your alarm will work even if your electricity is off. These systems offer peace of mind, protection, and the ability to check on your home when you’re not there, all while saving you money. In fact, having a home security system can potentially reduce your homeowner’s insurance premiums. Credit: www.amazon.com How Much Electricity Do Surveillance Cameras Use? How Much Electricity Do Surveillance Cameras Use? Surveillance cameras are an essential part of any home security system, providing peace of mind and protection. Many people often wonder about the amount of electricity these cameras consume. Let’s dive deeper into the power consumption of surveillance cameras and the factors that affect their electricity usage. The Power Consumption Of Surveillance Cameras When it comes to power consumption, surveillance cameras are designed to be energy-efficient. Modern cameras typically consume just a watt or two of power, which is a negligible amount of energy. In fact, their annual energy cost amounts to only a few cents. So, you don’t have to worry about surveillance cameras significantly impacting your electricity bill. Factors That Affect The Electricity Usage Of Surveillance Cameras While surveillance cameras have low power consumption, several factors can influence their electricity usage: Type of camera: Different types of surveillance cameras have varying power requirements. For example, analog cameras generally consume less power compared to IP cameras. Resolution and frame rate: Higher resolution cameras and higher frame rates require more power to capture and transmit detailed footage. Additional features: Some advanced surveillance cameras come with features such as night vision, motion detection, and pan-tilt-zoom capabilities. These features may increase power consumption. Video storage: Cameras that continuously record and store footage on-site or in the cloud consume more power compared to cameras that only record when triggered by an event. Length of operation: Cameras that are running 24/7 will obviously consume more electricity compared to cameras that are only active during specific times of the day. Comparing The Electricity Usage Of Different Types Of Surveillance Cameras When comparing the electricity usage of different surveillance cameras, it’s essential to consider their power requirements. Here is a comparison of power consumption for common types of surveillance cameras: Camera Type Power Consumption Analog Camera Low IP Camera Medium PTZ Camera High Wireless Camera Variable It’s important to note that these power consumption levels are approximate and may vary depending on specific camera models and configurations. In conclusion, surveillance cameras have minimal power consumption and won’t significantly impact your electricity usage and bills. However, it’s crucial to choose cameras that align with your specific security needs and consider their power requirements and additional features. How Much Power Does A Home Security System Use? How Much Power Does a Home Security System Use? Understanding The Power Consumption Of Home Security Systems When it comes to home security systems, one common concern among homeowners is their power consumption. People often wonder – do home security systems use a lot of electricity? Understanding the power consumption of these systems is important in order to make informed decisions about installation, usage, and overall energy efficiency. Home security systems consist of various components such as surveillance cameras, motion detectors, control panels, and alarm systems. Each of these components consumes a certain amount of power, which may vary depending on several factors. To estimate the electricity consumption accurately, it’s essential to consider the specific factors that determine the power usage of home security systems. Factors That Determine The Power Usage Of Home Security Systems The power consumption of a home security system can be influenced by several factors. These factors include: The type and number of security cameras: Different types of cameras, such as analog or IP cameras, consume varying amounts of power. Additionally, the more cameras installed, the higher the overall power consumption. The resolution and image quality of the cameras: Higher resolutions and better image quality require more power to process and transmit the video feed. The recording and streaming settings: Certain settings, such as continuous recording or constant streaming, can significantly increase the power usage of the system. The presence of additional features: Some security systems offer advanced features like facial recognition or night vision, which may require additional power to operate. The type of connectivity: Wired systems generally consume more power than wireless systems due to the energy needed to transmit signals over long cables. The efficiency of the system: The overall power efficiency of the home security system, including how it manages power usage during idle periods, can impact its electricity consumption. Estimating The Electricity Consumption Of A Typical Home Security System While it’s challenging to provide an exact figure for the power consumption of a typical home security system, we can estimate the electricity usage based on general averages. On average, a security camera may consume anywhere from 2 to 20 watts of power, depending on the factors mentioned earlier. Similarly, other components like motion detectors and control panels consume a relatively small amount of power. To put these numbers into perspective, let’s assume a hypothetical security system with four cameras, a control panel, and motion detectors. Taking the average power consumption of each component as a reference, we can estimate the monthly energy usage: Component Average Power Consumption (Watts) Camera (4 units) 60 watts Control Panel 5 watts Motion Detectors 10 watts Based on these estimates, the total power consumption of this hypothetical system would be around 75 watts. Assuming the system runs continuously for a month, the energy usage would be approximately 75 watts x 720 hours = 54,000 watt-hours, or 54 kilowatt-hours (kWh). It’s important to note that these are general estimates, and the power consumption can vary based on individual system configurations and usage patterns. To

Does Home Security Use a Lot of Electricity? Find Out Now! Read More »

What Causes False Alarms on Home Security Systems

What Causes False Alarms on Home Security Systems: Avoiding User Error

Low batteries are a major cause of false alarms on home security systems. Panel batteries should be replaced every three to five years, and sensor batteries every one or two years. User error can also trigger false alarms. Educating users on the proper operation of their security systems can help to reduce these incidents. False security alarms can be a nuisance and even deter some people from using their home alarm systems. However, these causes are preventable with proper maintenance and user education. Taking simple steps to minimize false alarms can maximize the benefits of an alarm system and ensure its effectiveness in detecting actual security threats. Subheading: Low Batteries A common cause of false alarms on home security systems is low batteries. It’s important to regularly replace panel batteries every three to five years and sensor batteries every one to two years to prevent false alarms. User errors can also contribute to false alarms. Faulty Batteries Can Lead To False Alarms One of the major causes of false alarms on home security systems is faulty batteries. When the batteries in the panel or sensors start to run low, it can trigger false alarms. It is important to regularly check and replace these batteries to ensure that your security system functions properly. Panel Batteries Should Be Replaced Every Three To Five Years The panel battery is the power source for the control panel of your home security system. Over time, these batteries can weaken or die, causing false alarms. To prevent this from happening, it is recommended to replace the panel battery every three to five years. By keeping the battery fresh, you can reduce the risk of false alarms and ensure the reliability of your security system. Sensor Batteries Should Be Replaced Every One To Two Years In addition to the panel battery, the sensors in your home security system also rely on batteries. These batteries power the individual sensors that detect motion or changes in the environment. Sensor batteries should be replaced every one to two years to prevent false alarms. Regularly checking and replacing these batteries will help maintain the accuracy of your security system and minimize any unnecessary alerts. Overall, low batteries are a common cause of false alarms on home security systems. By being proactive and replacing the panel and sensor batteries on a regular basis, you can prevent these false alarms and ensure the effectiveness of your home security system. Subheading: User Error False alarms on home security systems can be caused by user error, such as forgetting to turn off the system or entering the wrong code. Low batteries are also a major cause of false alarms, so it is important to replace them regularly. Educating users on how to properly use their home security systems can help reduce the occurrence of false alarms. User Error Is A Major Cause Of False Alarms False alarms on home security systems can be frustrating and disruptive, often causing unnecessary stress and inconvenience. One major cause of these false alarms is user error. When homeowners forget their alarm code or don’t arm the system correctly, it can inadvertently trigger a false alarm. Additionally, not turning off the system when entering the house can also lead to false alarms. Forgetting Alarm Code Or Arming The System Incorrectly A common user error that can result in false alarms is forgetting the alarm code or arming the system incorrectly. When homeowners are pressed for time or distracted, it’s easy to make mistakes in the alarm setup process. Whether it’s entering the wrong code or forgetting to arm certain sensors, these errors can lead to false alarms. It’s important for homeowners to familiarize themselves with the correct procedure and ensure that they always arm the system properly. Not Turning Off The System When Entering The House Another user error that can cause false alarms is simply forgetting to turn off the system when entering the house. This can happen when homeowners are in a rush or when they are not accustomed to using the security system regularly. When the alarm is not disarmed upon entering the house, any movement or activity can trigger the sensors and set off a false alarm. It’s crucial for homeowners to make it a habit to disarm the system promptly upon arrival to prevent false alarms. To avoid false alarms caused by user error, homeowners should take the time to thoroughly understand their home security system and its operation. They should ensure that all family members are familiar with the correct procedures and codes. Regular practice and reinforcement of the correct usage will reduce the likelihood of false alarms. By being diligent and vigilant, homeowners can help maintain the reliability and effectiveness of their home security systems. Subheading: Lack Of Awareness False alarms on home security systems are often caused by low batteries or user error. It’s important to regularly replace batteries and educate users on how to properly use their systems to avoid unnecessary alarms. Employees Or Household Members Unaware Of The Security System One common cause of false alarms on home security systems is when employees or household members are unaware of how the system works. If they are not properly trained or educated about the security system, they may inadvertently trigger the alarm, leading to a false alarm. This lack of awareness can occur when new employees join a household or if there is a lack of communication regarding the security system’s functionality. Accidentally Triggering The Alarm System Unknowingly Accidental triggering of the alarm system is another cause of false alarms. This can happen when someone in the household or an employee accidentally sets off the alarm without realizing it. For example, they may input the wrong code, mistake a motion sensor for a light switch, or accidentally bump into a sensor while moving around the house. Subheading: Equipment Malfunctions Equipment malfunctions, such as low batteries, are a common cause of false alarms on home security systems. Regularly replacing panel and

What Causes False Alarms on Home Security Systems: Avoiding User Error Read More »

How to Hide a Trail Cam for Home Security

How to Hide a Trail Cam for Home Security: Expert Tips and Tricks!

To hide a trail cam for home security, consider placing it under ceiling eaves or on a light post for better visibility and camouflage. Additionally, hiding the camera in organic matter such as leaves, branches, or tree stumps can provide optimal coverage. Another option is to use wax paper and silicone to create a disguised cover for the camera, such as on a piece of bark or tree. It is important to choose a shaded or covered area that minimizes glares during the day. Wireless trail cameras can also be beneficial for easy concealment. Overall, by strategically placing the trail cam and utilizing clever hiding techniques, you can enhance your home security without drawing unwanted attention. Credit: brinkshome.com 1. The Importance Of Proper Camera Placement When it comes to hiding a trail camera for home security, proper camera placement is crucial. Consider mounting it under ceiling eaves or on a light post for optimal coverage and concealment. Another effective hiding spot is among organic matter like leaves and tree stumps. When it comes to home security, proper camera placement is crucial in ensuring that your trail cam remains discreet and effective. Placing your camera in the right location not only helps in capturing suspicious activities but also prevents it from being easily detected or tampered with. In this section, we will explore the various factors to consider when selecting a hiding spot and understanding the line of sight and angle of the camera. Choosing The Right Location For Your Trail Camera Choosing the right location for your trail camera is essential to maximize its effectiveness. Here are some considerations to keep in mind: Identify areas of high traffic or vulnerable spots around your property, such as entry points, driveways, or backyards. Look for areas with natural cover, such as bushes, trees, or dense foliage, to conceal the camera. Consider mounting your trail camera under ceiling eaves or on light posts, as these locations provide a strategic vantage point while making it difficult for intruders to spot the camera. Factors To Consider When Selecting A Hiding Spot When selecting a hiding spot for your trail camera, take the following factors into account: Line of sight: Ensure that the camera has a clear line of sight towards the intended area of surveillance. Avoid obstructions such as branches or other objects that may obstruct the camera’s view. Angle of the camera: Position the camera at the correct angle to capture the desired area effectively. Experiment with different angles to find the optimal position. Consider the flash: If your trail camera has a flash, be mindful of its visibility. Ensure that the flash is not easily detectable to maintain the camera’s covert nature. Blend with the surroundings: Hide your trail camera in organic matter, like leaves, branches, or tree stumps, to make it blend seamlessly with the environment. Avoid direct sunlight: Choose a shady or covered area to prevent glares on the camera and maintain clear footage during the day. By strategically considering these factors and choosing the right location for your trail camera, you can enhance the security of your home while keeping your camera well-hidden from potential intruders. 2. Using Natural Elements For Concealment When it comes to hiding a trail cam for home security, utilizing natural elements for concealment is an effective and discreet approach. It allows you to blend the camera seamlessly into its surroundings, making it difficult for intruders or trespassers to detect. Here are some strategies you can employ to conceal your trail camera using natural elements: Hiding The Trail Camera In Organic Matter (leaves, Branches, Tree Stumps) One of the best ways to hide a trail camera is by strategically placing it in organic matter such as leaves, branches, or tree stumps. By doing so, you can mimic the natural environment and ensure that the camera remains undetected. Simply find a suitable spot, and carefully position the camera among the foliage or camouflage it within a tree stump. This method not only provides excellent concealment but also allows the camera to capture clear footage without obstruction. Utilizing Natural Camouflage Techniques Another effective technique for hiding your trail camera is by using natural camouflage techniques. Look for elements within the environment that match the camera’s appearance, such as color or texture. Consider utilizing moss, bark, or even lichen to cover the camera and help it blend seamlessly into its surroundings. Remember to choose materials that are durable and weather-resistant to ensure long-lasting camouflage. Considerations For Different Outdoor Environments (forest, Field, Backyard) It is essential to consider the specific outdoor environment where you plan to hide your trail camera. The camouflage techniques that work well in a forest setting might not be as effective in a field or a backyard. For instance, in a forest, you can take advantage of the dense vegetation to conceal the camera. On the other hand, in a field or a backyard, you may need to rely on tall grasses or shrubs to hide the camera effectively. To summarize, using natural elements for concealment is a smart approach to hide a trail cam for home security. By hiding the camera in organic matter, utilizing natural camouflage techniques, and considering the outdoor environment where the camera will be placed, you can ensure that your camera remains discreet and functional. 3. Strategic Mounting Options For Maximum Coverage To maximize coverage and hide a trail cam for home security, there are strategic mounting options available. One option is to mount the camera under ceiling eaves, where it will be difficult to spot unless up close. Another option is to mount it on a light post for a broader view of your property and surrounding areas. These options ensure discreet surveillance and effective security. Mounting The Trail Camera Under Ceiling Eaves For Optimal Concealment One of the most effective ways to hide a trail cam for maximum coverage and protection is by mounting it under ceiling eaves. This strategic mounting option not only provides optimal concealment, but

How to Hide a Trail Cam for Home Security: Expert Tips and Tricks! Read More »

How Long Do Home Security Cameras Record

How Long Do Home Security Cameras Record? Find Out the Storage Duration Now!

Home security cameras typically record footage for a duration ranging from three months to one year, with the oldest recordings automatically deleted to make space for new ones. Each security camera model may have different storage capacities, so the duration may vary. Factors Affecting Storage Duration Home security cameras typically record footage for a few days to a few weeks, depending on the available storage space. It is important to note that each security camera has different settings and storage capacities, so the recording duration may vary. Factors Affecting Storage Duration Varying storage duration based on different security camera models When it comes to home security cameras, the storage duration can vary greatly depending on the model you choose. Each security camera is designed differently, with its own specific storage capacity and recording settings. Some cameras may store footage for a few days, while others can store recordings for weeks or even months. It’s important to research and choose a camera model that aligns with your specific security needs and storage requirements. Influence of the storage space on the recording length Another crucial factor that affects the storage duration of home security camera footage is the available storage space. The amount of storage capacity on your camera’s hard drive or cloud storage will directly impact how long the cameras can record before old footage is automatically deleted to make room for new recordings. Let’s take a look at how different security camera models and storage capacities can influence the recording length: 1. Model A: This camera model has a built-in hard drive with a storage capacity of 1TB. With this capacity, it can typically record and store footage for up to 30 days before the oldest recordings are overwritten. 2. Model B: On the other hand, Model B offers cloud storage for its recordings. Depending on the subscription plan you choose, you can store footage for a longer duration. The basic plan may offer 7 days of storage, while the premium plan may extend the storage period to 30 days or more. 3. Model C: This camera provides expandable storage options, allowing you to connect an external hard drive or a microSD card. With such expandable storage capacity, you can customize your recording length according to your needs. For example, a 64GB microSD card can store approximately 7-14 days of continuous recordings, depending on the camera’s settings. In conclusion, when it comes to storage duration for home security camera recordings, it is essential to consider the varying capabilities of different camera models and their storage options. Factors like built-in hard drives, cloud storage plans, and expandable storage can all impact the duration for which your security cameras can record and store footage. By understanding these factors and choosing the right camera model with sufficient storage capacity, you can ensure that your security needs are met without worrying about running out of storage space. Credit: www.wired.com Average Storage Duration For Home Security Cameras Home security cameras generally store footage for a period ranging from three months to one year, depending on the specific camera and its storage capacity. The older recordings are automatically deleted to make room for new ones. Please note that storage duration may vary for different cameras. Determining The Standard Storage Duration For Home Security Cameras When it comes to home security cameras, one of the common questions that arise is how long they record and store footage. The average storage duration can vary depending on several factors. Let’s take a closer look at what determines the standard storage duration for home security cameras. Factors That Contribute To The Average Storage Duration Multiple factors can influence the average storage duration of home security cameras. These factors are essential to consider when setting up your camera system and determining how much footage you can retain. 1. Storage Capacity: One of the crucial factors affecting the recording duration is the storage capacity of the camera system. Different cameras come with varying storage capacities, which determine how much footage they can save. For instance, a high-capacity camera with a larger hard drive or cloud storage option might be capable of storing several months’ worth of recordings. On the other hand, cameras with limited storage capacity may only retain footage for a few days or weeks. 2. Recording Resolution: The recording resolution of a security camera is another determinant of storage duration. Higher resolution footage takes up more space compared to lower resolution recordings. Cameras with higher resolution, such as 4K or 1080p, produce clearer and more detailed images but require more storage space. As a result, the storage duration might be reduced compared to cameras with lower resolutions. 3. Frame Rate and Compression: The frame rate and compression settings of your security camera can also impact the storage duration. Higher frame rates, especially when coupled with less efficient compression techniques, can take up more storage space. Adjusting the frame rate and compression settings can help optimize storage without compromising the overall video quality. Strategic settings can extend the storage duration while still ensuring clear and usable footage. 4. Motion Detection and Continuous Recording: Another critical aspect that can affect storage duration is the recording mode selected. Many modern security cameras offer motion detection capabilities, where they only record when motion is detected, conserving storage space. If your camera is set to continuous recording, it will record footage regardless of any activity. While providing constant surveillance, this mode can use up storage space more quickly. Balancing between continuous recording and motion detection can help manage storage duration efficiently. 5. Storage Management Features: Some advanced security cameras offer storage management features that optimize the use of available space. These features might include circular recording, where older footage is automatically overwritten by newer recordings. Additionally, features like cloud storage or the ability to connect external storage devices can expand storage capacity and maintain longer durations of recorded footage. In conclusion, the average storage duration for home security cameras can vary depending on factors

How Long Do Home Security Cameras Record? Find Out the Storage Duration Now! Read More »

Is Simplisafe Good for Seniors

Is Simplisafe Good for Seniors? The Ultimate Security Solution

SimpliSafe is an excellent DIY security system for seniors, as it is easy to install and does not require tools. The system is designed to be user-friendly and offers a sense of independence while keeping older adults safe. Additionally, SimpliSafe provides affordable pricing options and top-notch professional monitoring, making it a great choice for seniors and their families. How Simplisafe Provides Security For Seniors When it comes to providing security for seniors, Simplisafe is an excellent option. The DIY installation feature ensures that even older adults can easily set up the system themselves, without the need for any tools or professional assistance. This makes it a convenient and cost-effective solution for seniors who value their independence. Diy Installation With Peel-and-stick Adhesive Strips Simplisafe makes the installation process easy and hassle-free with its peel-and-stick adhesive strips. Seniors can simply remove the backing on the adhesive strip and easily attach the sensors to any desired location in their home. No drilling or complicated installation required, giving seniors the flexibility to place the sensors wherever they feel most comfortable. No Tools Required For Installation With Simplisafe, there’s no need for seniors to worry about finding or using any tools for installation. The sensors come with pre-applied adhesive, which eliminates the need for any additional tools. Seniors can simply choose the desired location, peel off the backing, and stick the sensors in place. This ensures a quick and hassle-free installation process for seniors. Easy Setup With Base Station That Plugs Into A Wall Simplisafe’s base station is designed for easy setup. Seniors simply need to find a suitable location near a power outlet and plug the base station into the wall. This eliminates the need for complex wiring or setup procedures. The base station acts as the control hub for the entire system, making it easy for seniors to arm or disarm the system with just a few simple taps. Credit: www.cnet.com Benefits Of Simplisafe For Seniors Simplisafe is an excellent option for seniors looking for an easy-to-use, contract-free wireless home security system. Its DIY installation, affordable prices, and top-notch professional monitoring make it a great choice for older adults. With Simplisafe, seniors can feel safe and protected while maintaining their independence. As our loved ones age, their safety and security become a top priority. Simplisafe, the best DIY security system, offers a range of benefits that make it perfect for seniors. Let’s explore some of these benefits: Independence And Sense Of Security For Aging Parents One of the key concerns when it comes to aging parents is their sense of independence. Simplisafe allows them to live alone without compromising on their safety. With this system in place, they can have peace of mind knowing there’s reliable security in their home. They no longer have to rely on others for their protection, giving them a renewed sense of freedom. Carefree Lifestyle While Living Alone Living alone can be a daunting prospect, especially for seniors. Simplisafe takes away the worries that come with living alone by providing a comprehensive security system. They can go about their daily activities without constantly worrying about their safety. Whether it’s during the day or at night, they can enjoy a carefree lifestyle with Simplisafe. Non-existent Learning Curve For Straightforward Use Seniors often face challenges when it comes to technology and complex systems. However, Simplisafe is designed with simplicity in mind. Seniors can easily understand and operate the system without the need for extensive learning or technical expertise. The installation process is hassle-free, and the sensors come with adhesive strips for easy attachment. With Simplisafe, there’s no steep learning curve that might deter seniors from using it. In conclusion, Simplisafe offers numerous benefits for seniors. It provides them with a sense of independence, a carefree lifestyle, and a user-friendly experience. With Simplisafe, seniors can live confidently and securely in their own homes. Install Simplisafe and bring peace of mind to your aging parents. Comparing Simplisafe With Other Home Security Systems For Seniors Simplisafe is an excellent option for seniors looking for a straightforward, easy-to-install home security system. With its DIY installation and affordable prices, Simplisafe offers peace of mind without sacrificing independence. Adt: Top Security Option For Seniors ADT is a well-known name in the home security industry, offering comprehensive solutions for seniors. With professional installation and monitoring services, ADT ensures a high level of protection for older adults. They provide 24/7 monitoring, home automation features, and a wide range of security devices to meet the unique needs of seniors. ADT’s long-standing reputation and excellent customer service make it a top choice for seniors looking for reliable home security. Simplisafe: Easy Diy Installation And Affordable Prices Simplisafe stands out as the best DIY security system available, making it a great option for seniors. With its easy-to-install sensors that come with peel-and-stick adhesive strips, older adults can set up the system themselves without requiring any tools. The Simplisafe base station conveniently plugs into a wall, adding to the simplicity of the installation process. Moreover, Simplisafe offers affordable prices, making it a cost-effective choice for seniors who want to protect their homes without breaking the bank. Xfinity: Convenient Home Security For Seniors Xfinity provides seniors with a convenient option for home security. With professional installation and monitoring services, Xfinity offers peace of mind to older adults who may prefer not to handle the installation themselves. Additionally, Xfinity’s home security systems can be integrated with their existing Xfinity services, such as internet and cable, offering seniors a one-stop solution for all their home security and entertainment needs. In conclusion, when it comes to home security systems for seniors, ADT, Simplisafe, and Xfinity are all top options to consider. ADT’s professional installation and monitoring services make it a reliable choice, while Simplisafe’s easy DIY installation and affordable prices cater to seniors who prefer a more hands-on approach. Xfinity offers convenient integration with existing services, providing seniors with a seamless home security and entertainment experience. Features Of Simplisafe Home Security For Seniors SimpliSafe is

Is Simplisafe Good for Seniors? The Ultimate Security Solution Read More »

Wired Vs. Wireless Security Cameras

Wired Vs. Wireless Security Cameras: Pros and Cons

Wired security cameras use wires to transmit footage, while wireless security cameras communicate over Wi-Fi. Wireless cameras are typically easier to install and offer flexibility, while wired cameras provide better video quality and stability. However, wireless cameras may have disadvantages such as the need for internet connectivity, potential instability with Wi-Fi connections, and the requirement to monitor and recharge batteries. Overall, the choice between wired and wireless security cameras depends on individual preferences and specific needs. Understanding The Difference Wired Vs. Wireless Security Cameras | Understanding the Difference When it comes to setting up a security camera system for your home or business, understanding the difference between wired and wireless cameras is crucial. Each option has its own advantages and disadvantages, and knowing what sets them apart can help you make an informed decision. Wired Cameras: Use Wires To Transmit Footage Wired cameras, as the name suggests, make use of physical wires to transmit the captured footage. These cameras typically require professional installation and may involve drilling holes to run the cables. While this setup process may be more time-consuming and labor-intensive, it offers greater reliability and stability. One of the key advantages of wired cameras is that they are not dependent on Wi-Fi connections, which can sometimes be unreliable. This makes them a suitable option for areas with weak Wi-Fi signals or high interference. Additionally, wired cameras often provide better video quality due to the consistent and dedicated connection. However, it’s important to note that wired cameras may have limited flexibility in terms of placement and adjustment. Once the cables are installed, moving the cameras can be challenging, and adjustments may require professional assistance. Furthermore, wired cameras usually require a separate power source, which could be a drawback in certain situations. Wireless Cameras: Communicate Over Wi-fi On the other hand, wireless cameras rely on Wi-Fi connections to communicate and transmit the recorded footage. This wireless setup offers flexibility and ease of installation, making it a popular choice for homeowners and renters alike. Wireless cameras can be easily installed, adjusted, and moved without the need for complex wiring. One of the main benefits of wireless cameras is their convenience and accessibility. With Wi-Fi connectivity, users can access the camera feeds remotely through their smartphones or computers. This allows for real-time monitoring and peace of mind, especially when away from home. However, wireless cameras do have some limitations that should be considered. Wi-Fi connections can be unstable, leading to potential issues with video quality and reliability. It’s important to ensure a strong and stable Wi-Fi signal to minimize such concerns. Additionally, wireless cameras may require periodic battery recharges, which means keeping an eye on battery levels and ensuring they are adequately powered. Conclusion When choosing between wired and wireless security cameras, it ultimately comes down to your specific needs and preferences. Wired cameras offer reliability and consistent video quality, making them suitable for areas with weak Wi-Fi signals or high interference. On the other hand, wireless cameras provide flexibility, easy installation, and remote accessibility, making them ideal for homeowners and renters. Take into consideration factors such as your property layout, Wi-Fi signal strength, and desired level of convenience when making your decision. Ultimately, choosing the right security camera system can provide you with the peace of mind and protection you need. Factors To Consider When it comes to choosing between wired and wireless security cameras, there are several important factors to consider. Each option has its own unique advantages and disadvantages that can impact your decision. In this section, we will explore the key factors to help you make an informed choice. Installation And Setup Wired cameras: Wired cameras require more time and effort to install and set up. This is because they need to be connected to a power source as well as to a video recorder or monitor using cables. The installation process may involve drilling holes, running wires through walls, and positioning the cameras strategically. It can be a bit complex and may require professional assistance. Wireless cameras: On the other hand, wireless cameras are much easier to install and adjust. They do not require any complicated wiring or drilling, which means you can set them up quickly and easily. They use Wi-Fi to transmit the footage to a receiver or a cloud-based storage system. This wireless setup also allows for easy repositioning and adjustment of the cameras as needed. Mobility And Flexibility Wired cameras: Wired cameras are less maneuverable compared to wireless cameras. Once they are installed, it can be difficult to move or reposition them. If you need to change their location, you will have to go through the process of rewiring and reinstalling them. This lack of mobility makes them better suited for permanent installations. Wireless cameras: On the other hand, wireless cameras offer more mobility and flexibility. They are portable and easy to move from one location to another without any hassle. This makes them ideal for temporary setups or for monitoring different areas of your property as needed. Wireless cameras can also be easily repositioned to capture a new angle or focus on specific areas of interest. Video Quality And Stability Wired cameras: One of the key advantages of wired cameras is that they offer better video quality and stability. Since they are connected directly to the video recorder or monitor through cables, the transmission is reliable and uninterrupted. This ensures clear and high-definition video footage, making it easier to identify finer details. Wireless cameras: However, wireless cameras rely on Wi-Fi connectivity, which can sometimes be unstable. This can result in occasional signal dropouts or lower video quality, especially if there are obstructions or interference in the environment. However, advancements in technology have improved the stability of wireless connections, and with a strong and reliable Wi-Fi network, the video quality can be quite satisfactory. Reliability And Dependability Wired cameras: In terms of reliability, wired cameras generally have the upper hand. Since they are hardwired, there is no dependency on Wi-Fi or any

Wired Vs. Wireless Security Cameras: Pros and Cons Read More »